
Add a checklist and cover photo to a note
Paper, pens and glue belong with the craft idea. A checklist records what is already ready.
- 1
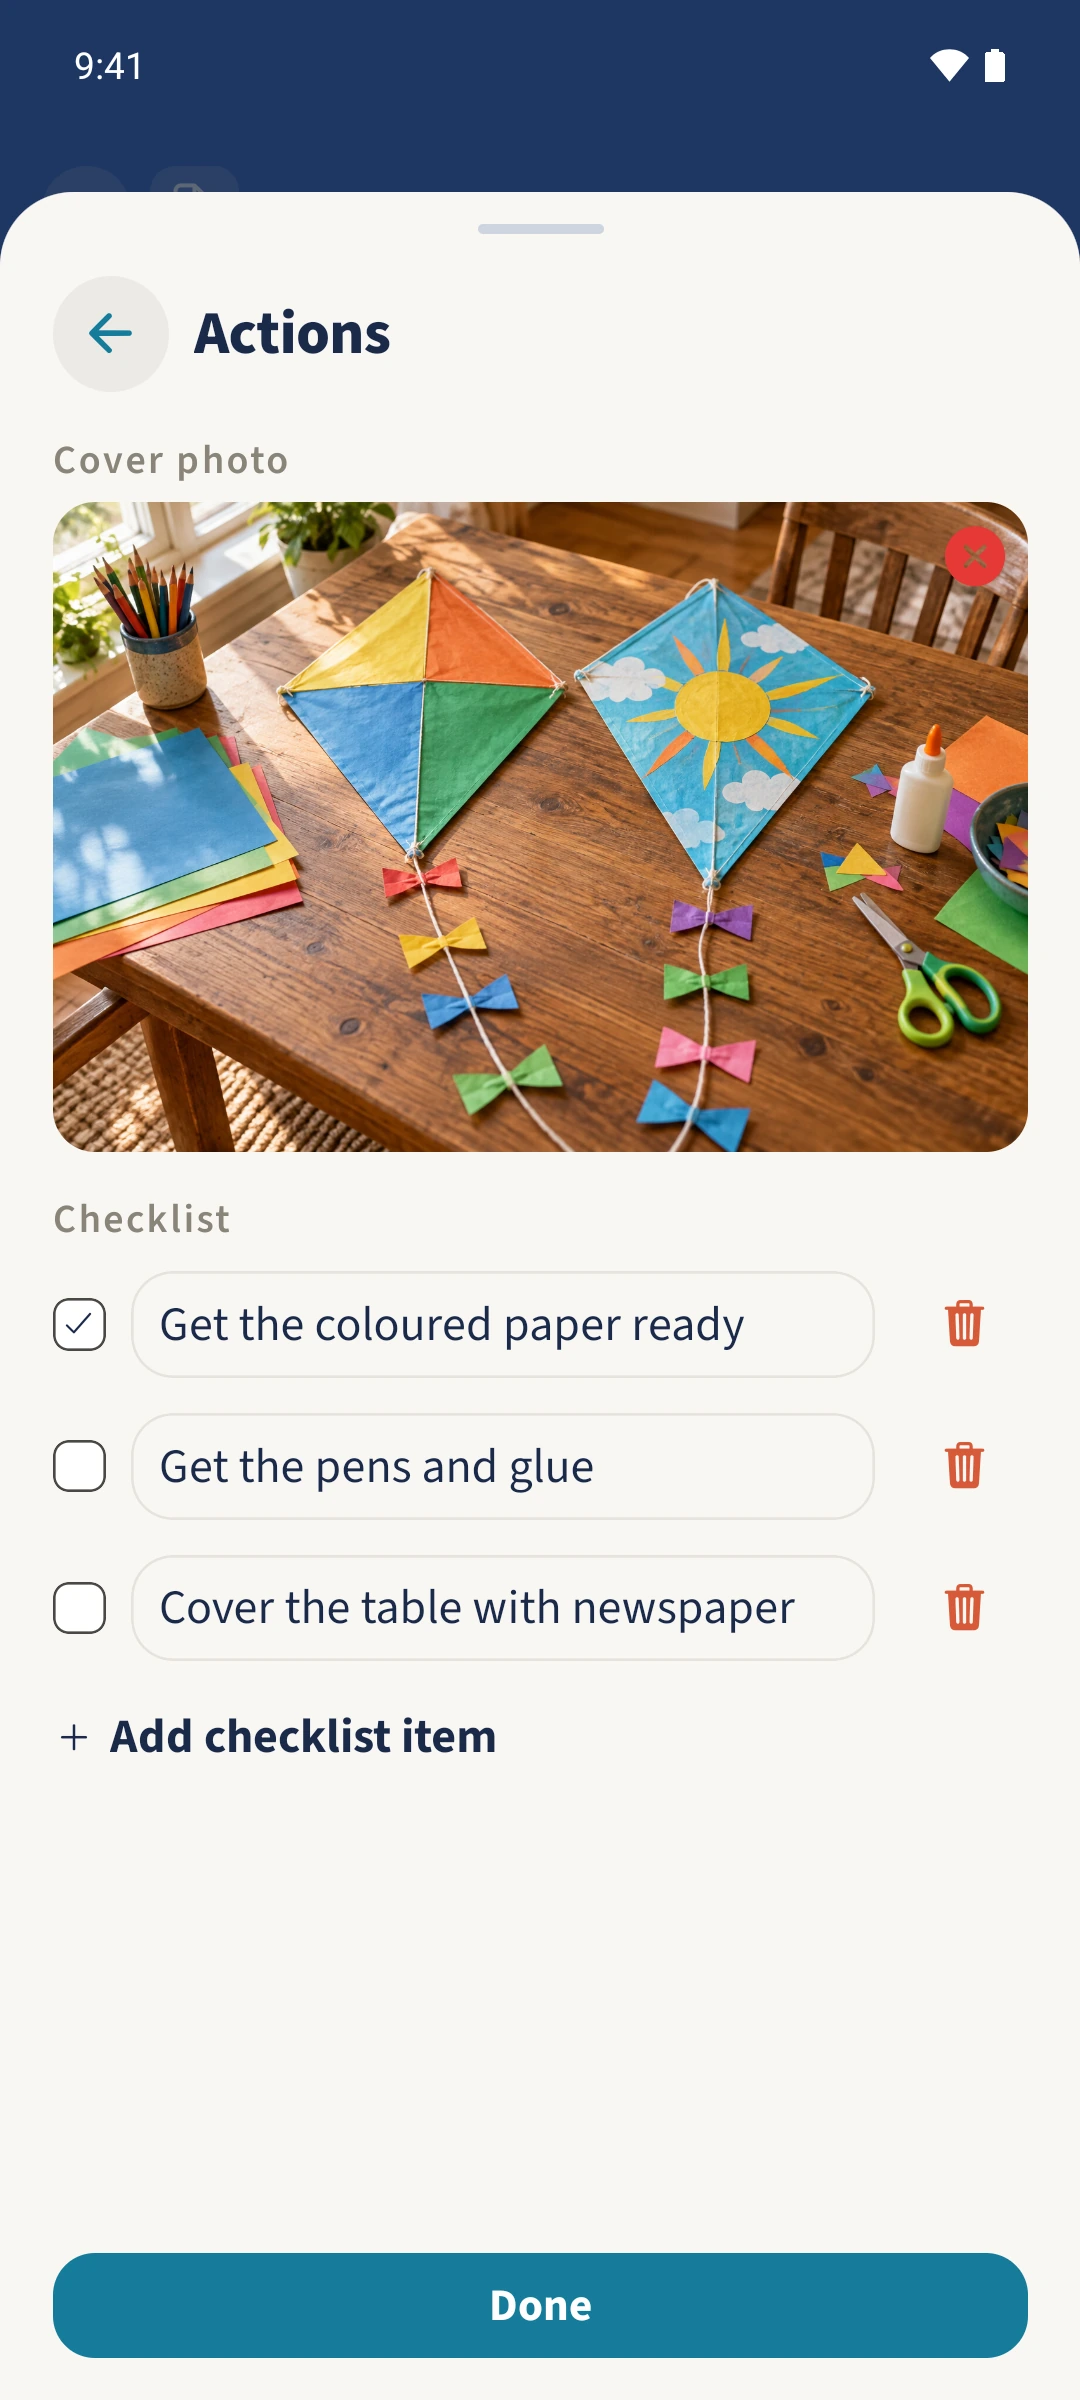
- The Android note form’s additional menu includes checklist items and image selection.
- 2
- Checklist items can be ticked off and saved in the edit form.
- 3
- The saved detail view shows the cover photo and checklist completion state.
Using Notes in family life
The plan is in a note, the materials are on another list and the picture is in the photo gallery.
Edit the note and open Actions in its form. Add checklist items and a cover photo there. Tick off finished items in this editor, close the additional menu and save the note. Its detail view then shows the photo, text and checklist together.
How the steps fit together
- 1
Open the additional menu
Open the note and choose Edit. In the edit form, open Actions at the top.
- 2
Edit the checklist
Under Checklist, use Add checklist item to add a row. Enter a specific preparation step. Tap its checkbox when it is complete; the bin icon removes a row.
- 3
Choose a cover photo
Under Cover photo in the same menu, choose Add photo. Select an image from the device picker and confirm its preview with Add photo. It is still part of the unsaved form at this point.
- 4
Save the note
Close the additional menu and save at the bottom of the note form. Reopen the note and check that the cover photo and completed checklist items appear in its details.